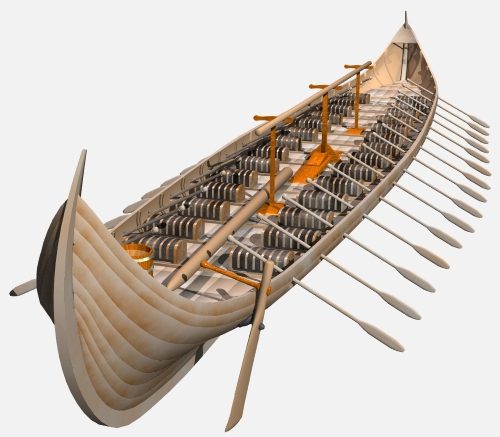
Splines are fine for the Gokstad Viking ship
Part 8

Let me share some of the texturing ideas that I have used for my own Viking ship model.
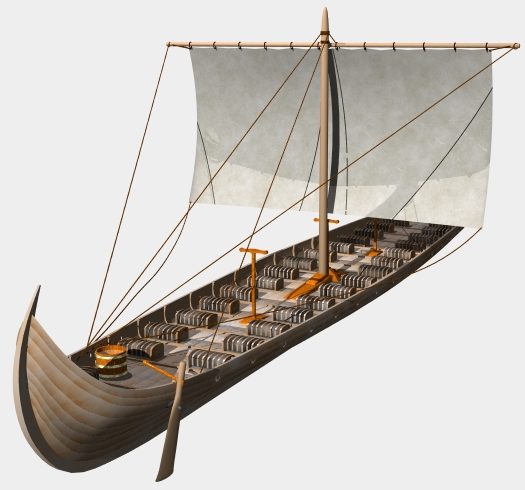
Above, the Gokstad (your model) rigged for attack: mast down, sail reefed, yard stowed, and oars out.
Open your file ship_tute20.lwo
1. Take the outer hull, paste it into an empty layer, reduce it once more to 1/4 of the full-sized hull, and cut it into strips, naming them H1, H2, H3.....H8.

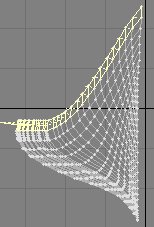
2. Name the first strip H1, cut it and paste it into an empty layer. Do this
successively with all of the next hull sections. I made 8 such strips. You can
make more. Fewer won't look right. Once they are recombined, as you can see
in my dramatization, they are all individual entities (Hull boards), labeled
H1 - H8 from top to bottom. As such we can texture them individually and in
spite of the extreme curvature of each board.
Don't recombine them at this time. Leave them in their individual layers. Save your file as ship_tute21.lwo
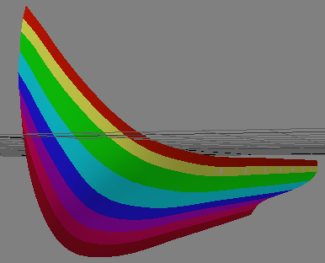
3. I also created a weight map for each of them,
which I called H1W - H8W. Here's what you do: Change your perpendicular viewport
from Smooth Shade to Weight Shade. All of the hull will now look a pale green.
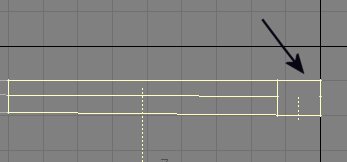
To facilitate that, I vertically combined all of the double polygons and hit
<Shift-z>. This turned them into a single polygon. Do
this for each double row. The ARROW points at the first of the combined polygons,
while the second set is pre-selected. Before you go combine the two polys, deselect
the first one, or they'll all combine vertically and horizontally. You only
want to combine them vertically. By the way, now you know why I quartered the
hull once more. Labor saving procedure.
4. Next you
can delete all of the left-over points. We'll talk again after you're all finished
and build the weight maps.

5. First, though, set the stage for the use of the weight maps:
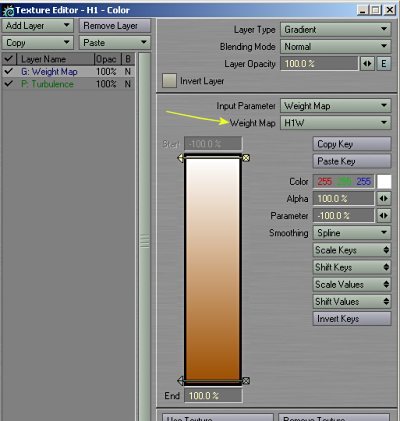
a) Go to the Surface Editor - Pick a Hull segment (H1 - H8).
b) Open the Texture Editor for that segment (H1 in this example).
c) Go to Add Layer and select Gradient
d) Go to the Input Parameter and select Weight Map (since we don't have them yet, leave the window labeled Weight Map at "none")
e) Set the Alpha and Parameters to 100%
f) Click anywhere on the gradient window and slide the new arrow to the bottom, as shown. Pick a color for the Parameter. I chose 157, 079, 000
Close the Texture Editor and then in the surface Editor copy (and paste) that color to all of the Hull sections, the Keel, the Mast, the Rudder (NOT the control arm), the yard, the toprail, the deck, the Inner Hull, the ribs, and the endcaps.
6. Done? Good. That took
a few minutes, didn't it? Now take the first strip (know which one it is, H1
- H8 - remember, each is in its own layer), and select all of the points along
the lower edge. The one shown here is H3.

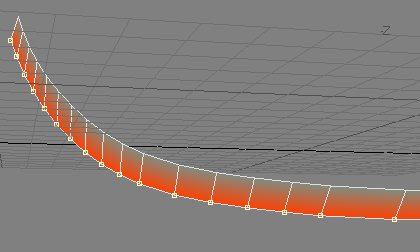
7. Click on MAP/New Weight Map and name it HxW (since I am showing H3, the weight
map will be called H3W). Hit ok. and you should see this: The weight map. If
you don't select the points at the base, the map will go solid red.
8. Recombine all of the hull segments and save file as ship_tute22.lwo

9. Open the Surface Editor - Open the Texture Editor for one of the hull sections (H1 - H8) - Then, where the arrow points, input the appropriate weight map that you have earlier created: e.g. For hull section H1 (shown here), input weight map H1W...for hull section H2, input H2W...and so on.

10. Now let's do something with the deck. Select the deck and cut and paste
it to a new vacant layer. Then quarter it, as you did with the outer hull.
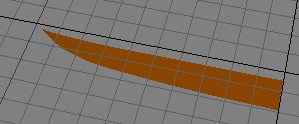
11. Go to CONSTRUCT/Knife and start cutting this baby into strips. The arrows
show you where to cut (looks like I've missed an arrow).

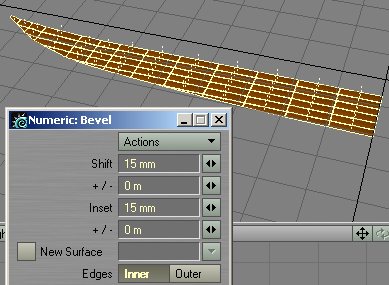
12. Go to the Polygon Edit Mode and select all of the polygons. Then bevel them
as shown. The result will be that the deck now has slots, indicating planks,
laid down between the ribs.
13. Now it's time to select both of the outer hull and the deck layers, and
mirror them in the X and Z axes, and see how this thing renders. Save
the file as ship_tute22.lwo
WOW! I must say I am pleased. All of the slicing and weight-mapping paid off. You may be of a different opinion, but this is starting to look pretty darn good (I am biased, of course). Tweak the colors, add Fractal Noise and/or Turbulence to each hull section. Slightly different each time. It's up to you, as will be the addition of Vikings, weapons, shields, and other details. Bye ;-) for now.

You can download the latest .LWO file (22) here, including
the scene file for the left image: Viking6.zip
. Depending on which layers you clear in Layout, you can have either the Sail-up,
or the Attack configuration shown in the image at the top of this page.
Created by Karl Stocker (pixeltek), a 3D hobbyist and occasional freelance artist. If you'd like to contact him, send email to: pixeltek@yahoo.com or visit his website at: www.cosmic-pearl.com