Part 2

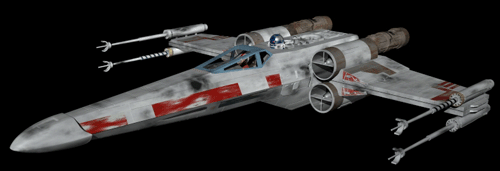
Here we go for the second installment and the upper fuselage.
NOTE: Save your files frequently. That way, should anything go wrong, you don't have to go back very far to restart your project.

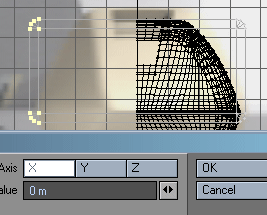
1. Let's start with a box cross-section with rounded corners. Open a new layer while keeping the nosecone's layer in the background, use these directions:


2. Again, I prefer to work with just half of a symmetric object, and thus would like to delete half of the cross-section. To do this, select all the points on the left side, hit 'v' and in the Set Value window enter a zero (if it is not already there) for the X-axis and hit OK. Then go to polygon mode (Space Bar) and in the stats window ('w') select and delete any one- and two-vertex polygons.


3. Select the lower three points and their compliments, now on the center line, as shown, and delete them. We don't need that radius at the bottom.

4. Here's what is left at this point in time.


5. Arrange the cross-section this way. We want the fuselage to start a little way inside of the nosecone. Here is how you arrange the polygons all in one plane: You place your cursor on the point where you want them. Then take that value (a Z - axis value, in this case) and enter it into the Set Value window, after you click on the Z - box. Hit 'OK" and the polygons will be perfectly aligned.

6. Select all of the points (or polygons) - hit 'e', and extend them this way, using the backdrop reference image as a guide. THis is the side view.

7. In the top view, (I rotated this picture by 90 degrees) hit 'h', and arrage the square cursor on the centerline. Then with the Ctrl key depressed, widen the cross-section to conform with the general outline of the background image. I use 'h' to get an even expansion between the points, rather than the more 'painful' points editing.

8. Repeat that expansion process in the side view. Again, with the backdrop image as a guide. This leaves us with artifacts from the extension process such as this. You don't want all those extra polygons and should select them and delete them. All we want is the outside, i.e. the X-Wing skin. Much simpler that way.

9. Next select the bottom and center polygons and delete them:

10. Continue to extend the (now much simplified) outer skin to just past the cockpit area and then make a cut (Shift-k) as shown. The reason is that there are some small angular changes here.

11. Make a second cut just aft of the large cockpit window. In the side view, this would be approximately, where the canopy dips the lowest.


12. After the cut, extend the fuselage all the way to here, the end of the sloping portion of the fuselage - stop, hit 'e' again, and then extend the fuselage all the way straight to the end, before it folds inward and terminates.

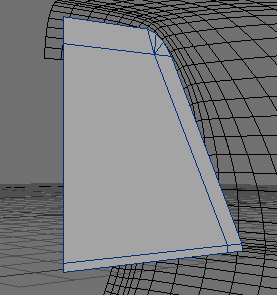
13. Now you can see the reason for the two cuts. Grab the points of the top part of the second cut, shown here, and, while holding down the Ctrl key, pull them down to conform with the sideview of the background image. Shown in the bottom pic.

14. Now for a little more point editing. Select the upper points, you can see how the pulling-down action also resulted in an inadvertant pinching-in of the skin, and pull those points until the outer edge of the skin is once more parallel with the rest of the fuselage. The idea is to have a smooth skin, without any dramatic folds or corners. Just look at the reference images. Play with that, until, toggling 'Tab' on and off, it all looks smooth to you.

15. You now will place a cut ('Shift-k') from the lowest point where the skin has been pulled in to conform to the cockpit, straight aft. The blue T-shapes show you where the cut is located.

16. Three things:
a. Where the arrow points, you will most likely find two points, one of them created with the cut. Weld them together.
b. Take the two new points, shown below, and pull them outward a little, to look like this.
c. Go to the top, flat area, of the fuselage, select the large polygon, and smooth-shift it down (Shift-f). You can just see that at the edge of this image, where the arrow points.


17. All the way at the end of the fuselage, select the points, hit 'e' and extend them a bit, as you see here, and after the extension, use 'Shift-h' to pull the edge slightly inward. Make sure the cursor is placed in the center of the fuselage, as seen from the back.
Now hit 'e' again, but use 'Shift - h' to pull the points straight in (no horizontal extension this time).
In the side view, measure the point where the fuselage ends. Then select all of the points at the end of the fuselage, the ones that should be in one plane, and use Set Value, to align them vertically. You can see the result in this image. Note, here only the inner points are selected. You want to select the outer AND inner points, to assure that they are all perfectly aligned in the side view.
Next you want to create the polygon to close then aft section. To do this, you will need a center point. How to get it there? Take the point indicated by the black arrow, in the left image, and COPY in into an empty layer. Use Set Value, with X = 0 to snap that point to the centerline. Then CUT and paste it back to the fuselage layer, and you have the needed point, as shown here with the blue arrow. Now, with all of the inner points selected sequentially, as shown, hit 'p' and you will have the aft polygon.

18. Select that aft bulkhead polygon (if it is not already selected), go to bevel ('b' and 'n') and in the numeric window set Inset = 0, and Shift = - .3 m ( - 300mm). Now delete the two center polygons shown here.

19. After the smoothshift of the top surface of the fuselage, delete the polygon shown here (and any polygon along the centerline).


20. With the end-polygon deleted, we now have an empty space to bridge. The two surfaces that are selected here need to be smoothly connected. To do that, cut and paste them to an empty layer, and then weld the upper points of the ramp to the points of the horizontal top deck. The curved arrow indicated the welding direction. Why go to an empty layer? So not to drag the other polygons, connected to those points along with the welding action.
NOTE: When welding points, control the direction by order in which you select them. The first point selected will weld to the second point selected. That also means that you need to be consistent, when you weld a number of adjacent points, to make the welding 'joint' consistent.

21. After cutting and pasting the now welded surfaces back to the upper fuselage layer, you will notice a small triangular space that is open. Select the three points and hit 'p' to create the small triangular polygon.

22. I went ahead and dropped (Shift-f) the top surface down just a tiny little bit more. Your choice.

23. With everything mirrored, this is what you should have at this time. Make sure you save your files frequently.
Also, to make things easier, select all of the fuselage polygons in the Polygon Stats ('w') panel and hit 'q'. Give them a name and a level of smoothness. More details on that later.
(last update 27 AUG 06)
In part 3 of this tutorial you will create the upper fuselage.
Created by Karl Stocker (pixeltek), a 3D hobbyist and occasional freelance artist. If you'd like to contact him, send email to: pixeltek@yahoo.com or visit his website at: www.cosmic-pearl.com