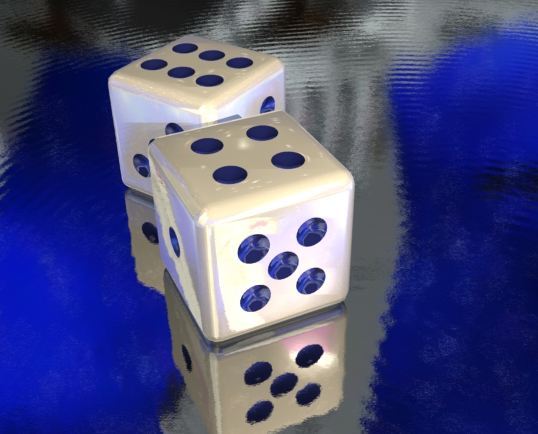
Stencil Those Shiny Dice in LW 7+
The files, incl. the scene file (for this render) with the reflection maps I used, can be downloaded here: Dice.zip
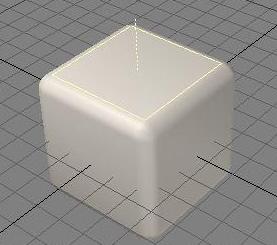
1. Open LW modeler and create a box like so (Note: Hit "F2" to center the cube in the three axes. Everything will work better that way):

2. In a different layer create a disk like so:

3. Go to the first layer and select each side of the cube one by one and cut (x) it. Then paste (v) it into its own layer. You have the cube's skeleton left.
4. Go to the layer with our single dot and select it. Then copy it (c), paste it (v), cut it (x), and place it into its own layer. There copy it as shown. Use Ctrl-t to slide the copies, one up, one down, as shown. We now have a 3-dot. Before you rush off to rotate this 3-dot item, let's make this one half of the 6-dot. By now you know the routine: select them all, copy them, paste them back, cut them and place them into their own layer.
5. The next step is obvious. Slide the three
dots to one side (use Ctrl-t) and copy and paste and slide, or mirror them as
I did. That way they are perfectly placed.

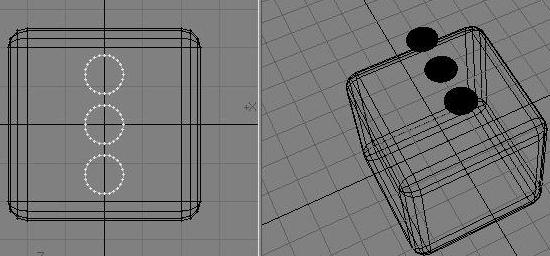
6. Now we have a 1, 3, and 6-dot layer (each separate). However, we need to add a little twist to number three:

7. Now we have the 1,3, & 6 complete and are set to do the 5-dot layer. Copy the 3-dot to a new layer. Then select two of them, as shown, and we'll copy and paste them, which I did to an empty layer, keeping the original three in the background. There rotate the copied dots.
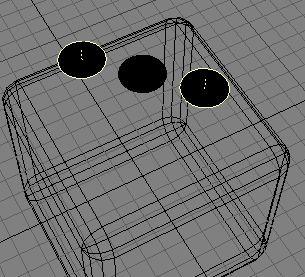
8. As you can immediately see, they have to be rotated 90 degrees around the Y-axis to give us a proper 5-dot arrangement:

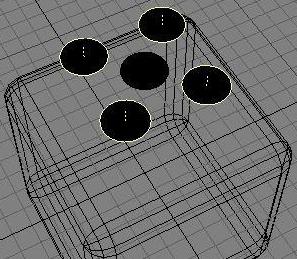
9. Cut and paste the two rotated dots, so that they are reunited in the layer with the (second set of) three dots. We now have completed 1,2,3,5, & 6 all in their own separate layer. On to the final one. The 4-dot layer. Lasso (select) the center dot of the 5-dot layer, click on SCENE/sel invert and you have four dots selected. Copy and paste them to their own layer, the 4-dot layer. We are finished. We now have 13 layers, six side and six dot-layers, plus the one with the cube's skeleton.
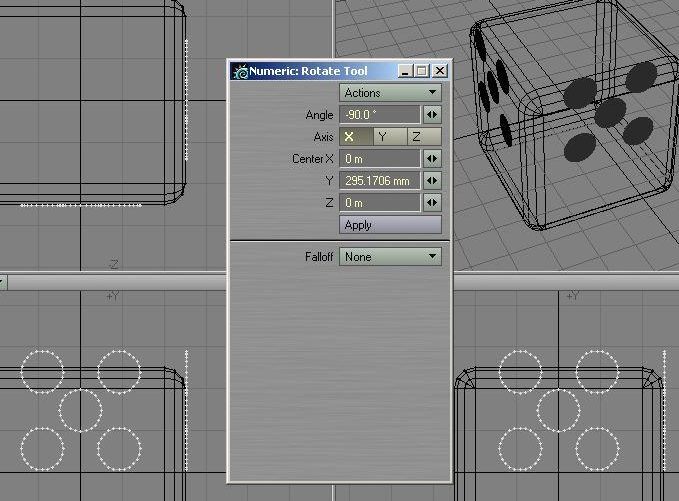
10. Since all of the dots are in the same plane, and only two, the 1 and the 6 should be, we have to move the other dots to the correct layers. Select two layers at a time by holding down the Shift-key. Grab the 5-dot and 2-dot layers this way. Next rotate them this way.

11. Now select the 3-dot and 4-dot layers and rotate them in the X-axis. We now have all of the dots placed in the correct planes and are ready to stencil.
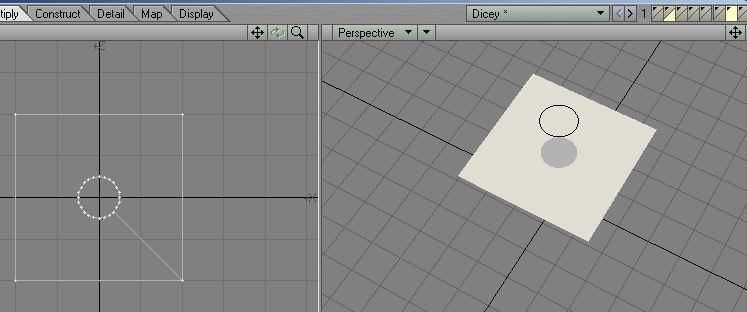
12. Go to the layer with the top surface and put the 1-dot layer in the background as shown. Then click on MULTIPLY/Drill. Choose the Y-axis, Stencil and OK. and the first dot is done. IMPORTANT NOTE: Before you stencil: Switch layers with (')-key, which places the dot in the foreground and hit "F2" and it will place each of the dot groups precisely in the center of the respective side. Do this for each dot-layer.

13. And there it is! Repeat the exact steps with the 6-dot layer and the bottom surface of the dice (the 1 & 6 are in the same plane, opposite from each other).
14. Now you'll work in the X-axis and repeat the above steps for the 4-dot and the right side and the 3-dot and the left side both stenciled in the X-axis as shown. I will not also repeat all of the instruction for the 2-dot and 5-dot layers, which you will have to stencil in the Z-axis to the front and backsides of the dice.

15. After all of the sides have been stenciled, I placed them all in the same layer. You may do that if you like, or place them all back in the layer with dice "skeleton". Name the dots "Dot" (by selecting them all and hitting the "q" key and assign a black, smooth color to them to make them clearly visible).
After that we're off to beveling. After opening the Polygon Statistics Panel (w) in the Polygon edit mode and click on the surface "Dot", and you select all of the dots at once, then bevel them all at once (I use the keys "b" and "n"). The numeric bevel panel shows the settings I used.
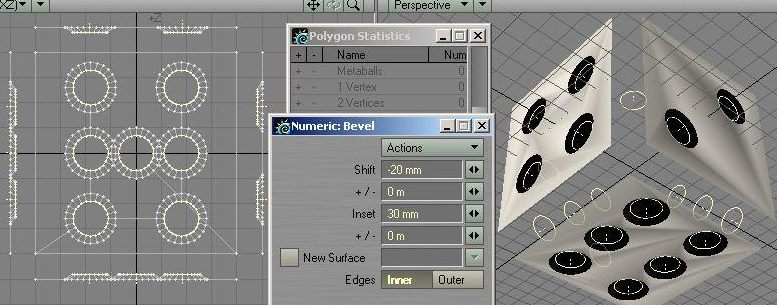
17. Here is the result of the second bevel process:

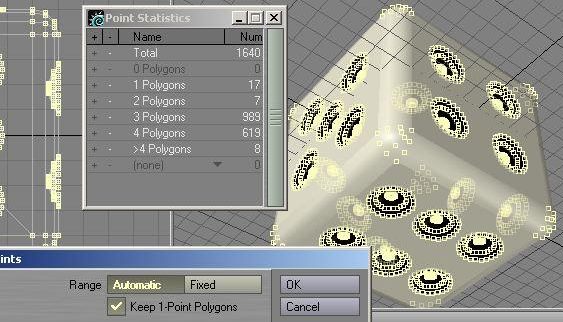
18. Now go to the Point Edit mode and in the Point Statistics Panel click on "Total" and the used the "M" key to do a point-merge. 24 points, i.e. all of the side panels are merged.
19. And here we are, ready to go to the layout and play with our dicey subject.

20. Feel free to use the surface assignments from the files, or make them any
color or even translucent, you like.
The files, incl. the scene file (for the top render) and reflection maps I used,
can be downloaded here: Dice.zip
Created by Karl Stocker (pixeltek), a 3D hobbyist and occasional freelance artist. If you'd like to contact him, send email to: pixeltek@yahoo.com or visit his website at: www.cosmic-pearl.com