
Splines are fine for the Gokstad Viking ship
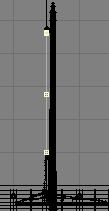
This is a model that was on display at the amazing Roskilde Fjord Vikingship museum, near Copenhagen. Some of the rigging is visible. Off to the right you can just make out the dark hulk of the assembled and mounted wreckage of one of the six Viking ships that had been recovered from the silt of the Fjord.
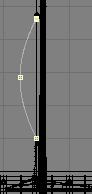
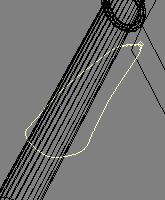
1. Open file ship_tute18.lwo and select an empty layer with the yard in the background and put down these points and connect them with an Open Curve.
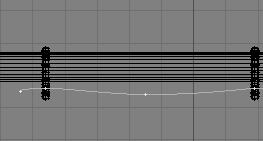
2. Continue to create points until you reach the center of the yard (Y
axis). Connect them with an Open Curve as well.


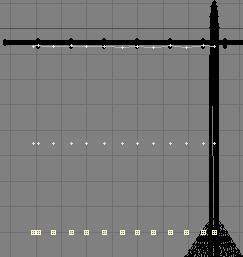
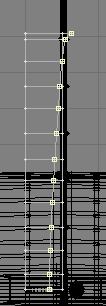
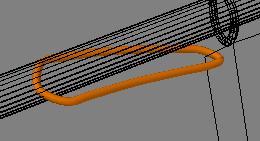
3. Copy all of the points halfway down the mast.
Straighten them out (Set Value), and then copy them again to
about where I show them.


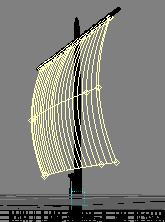
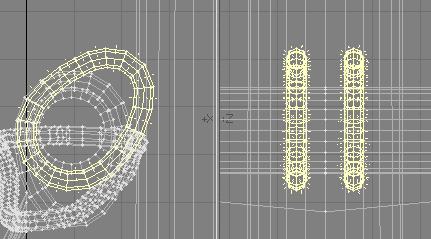
4. There, you now have created half the points
for the sail. Go ahead and connect them with Open Curves the same way you did
the top row of points. Then connect them all vertically. After that you will
shape the sail a bit, to make it appear as if it were slightly filled by wind.

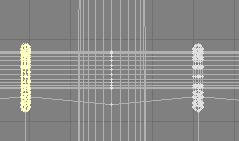
5. Just in case this happened to YOU, select
all points, go to Set Value (<v>) and set all points
to ZERO in the X axis. Piece of cake.
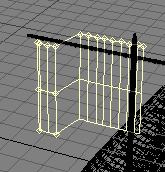

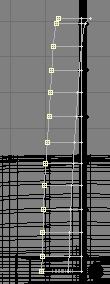
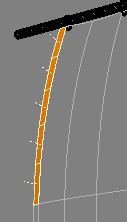
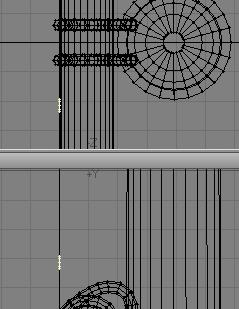
6. Go to the side view and drag the center row
of points forward.
7. Now select just the bottom row and slide the points (<Ctrl-t>)
as shown. Next, select the center row of points and sort of follow the bottom
row. When done, IF you were to mirror the polygons, it would look like the image
on the right. It's about the look I was after.
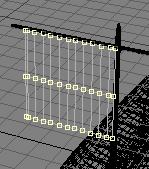
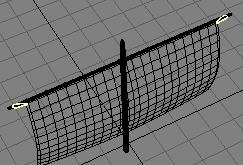
8. Now you can start patching the sail<Ctrl-f>. Use 1
and 5 as the number of rows and columns. Let's see how that works. Looks ok
to me. Continue until the entire sail has been patched. After you're finished,
mirror the whole thing (polygons please) in the Z axis, and
you're looking at a passable sail, IMO. Select it, hit <q>
and name it Sail. Make the color double-sided. Sometime, in the next part, you'll
be texturing it anyway. Save file as ship_tute19.lwo


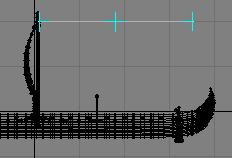
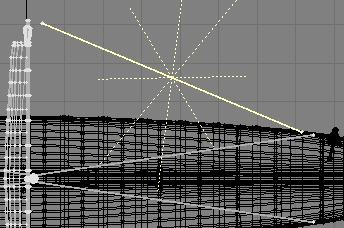
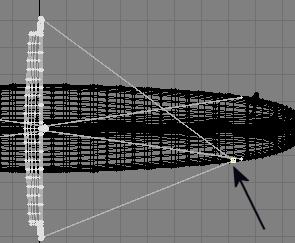
9. Rigging! We will now add the necessary lines to the ship and if you want
to get any more into it. I will leave that to each individual. We'll need four
lines to keep the mast up. Two in front and two in back. We will also need four
lines to control the sail, all leading to the back.
Open an empty layer and have the mast and sail in the background. Create these points. Select the end points and move them. Then go to DISPLAY/Select Inverse and copy and slide the other points as shown.

10. Go to MODIFY/Drag and move the points and I did. Connect the dots with a
Closed Curve.

11. Go to an empty layer, keeping the curve in the background and create this
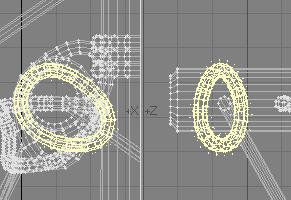
disc.


12. Rail Extrude it, and call the result "Sail Holder". We now created
the rope that holds the corners of the sail and keeps the sail and hoops from
bunching up. Mirror the Sail Holder and color it the same as the Hoops.
13. Now select and copy one of the center Hoops. Rotate it as shown in the left
image. Save file as ship_tute19.lwo
14. Create a 20 mm disc, and Lathe it.

15. Copy the loops and place them as illustrated.

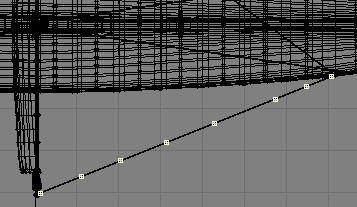
16. Now on to the mast lines. It doesn't get much easier than this. Put both mast and ship in the background of an empty layer. Create a disc, and then stretch that baby all the way to near the end of the ship.

17. Grab the end points and swing them toward the railing (gunwhale?). After you finished that, mirror the line across the Z-axis.


18. Mirror both lines on the X axis and adjust the endpoints at both ends. You want the ones at the hull to be touching the railing, and the ones at the mast to be immersed in the mast Loops.
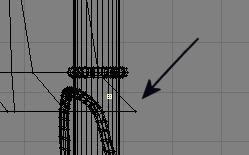
19. Take the upper line, in the top view, copy it, and rotate it as shown. Grab the points at the yard end and pull them into the end of the yard.
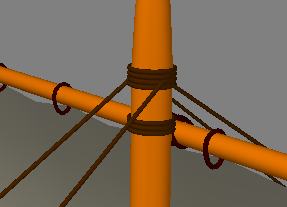
20. To "terminate" it on the yard, copy one of the yard Hoops, slide it to the end of the yard, and rotate it in the side view toward the Rig 2 line. Next, in the Top View, rotate the hoop to align it with the line as shown. To make it a little better, select the end points of the line and move them into the hoop.
21. Here you see the result of that bit of detail work. If you want to be more correct, and it is your work, after all, you could conceivably bring the hoop to more of a point and then make a thick connection (a tiny ball) to simulate a knot.

22. Mirror that stuff in the Z-axis, and grab the end points of the upper line, and pull it down to where the arrow is. Then select that last bunch of lines and call them Rig2. Save file as ship_tute19.lwo

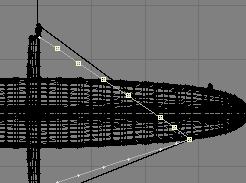
23. Now to the final set of lines. Put all you see in the previous illustration into the background of an empty layer. You'll use it as a guide for the next set of lines (Rig3). Now expand the top view and create a set of points. Spacing is somewhat arbitrary at this point. Next you will have to rotate the row of points, to have the left-most point just above the shadow image of the sail tip. I am showing you a magnified view of this. The arrow points at the tip of the sail, the final destination. Connect the points with an Open Curve, and mirror the line in Z.
24. Here you will have to slide the new set of points, until they form a reasonably straight line from the corner to the ends of the first line. Anyway, look and you'll see what I mean. NOTICE: I did not select the first point at the sail, because I don't want to move it. After some fiddling about, this is what you should have:
25. You realize that the reason for the points is that these lines will be curved, just to make things look a little more interesting. Now go to the sideview, grab all of the points and create a good approximation of a slightly curved line. Yes, I know, the left view is where you start out, but this (right) is where you should end up. By now I hope I don't have to hand-hold you through yet another Rail Extrude evolution. This is what you need to do:
1. Copy one of the lines to an empty layer.
2. In another empty layer, with one of the lines in the background, create an 8-sided 20 mm (2 dimensional disc).
3. Make sure you position the disc at the beginning (Diamond symbol) of the curve (the "rail"). Rotate and move it so that the center of the disc points down the rail.
4. Go to MULTIPLY/Rail Extrude and let it rip on "automatic".
You'll have a nice curved line from the lower corner of the sail to the left side of the railing. Repeat the process for the other curve.


26. Just a few short minutes later, this is what you've got:

Save your file as ship_tute20.lwo
Here are two renders. One in the attack mode, with the sail down and the mast in the bottom of the boat, and one under sail. The keel is not sub-d'ed in the renders. The earlier .zip had the keel "tabbed". I changed that in the most recent .zip.
You can either fill it with LW Vikings (I want to see the tutorial), or you can build Poser Vikings and equip them with gear from Renderosity. Lots of free Poser downloads there. Anyway, I hope you like it, and you considered it useful. Let me add a comment here. These are largely the same bits and pieces I have used on my own Viking ship. I only opted to extend the keel into some spiral design and as of tonight added some shields and minor modifications (I flattened some of the sea chest tops to mix flat- and round - topped ones. What you do with this is up to you and your imagination. You supply the labor and the skill. Oh, and feel free to send me advice on the texturing of the hull. Everything else is pretty easy, from what I can tell.


The scene files are included in the .zip
You can download the .LWO file here: Viking6.zip
Part 8 Some texturing tips and the latest .lwo and lws file.
Created by Karl Stocker (pixeltek), a 3D hobbyist and occasional freelance artist. If you'd like to contact him, send email to: pixeltek@yahoo.com or visit his website at: www.cosmic-pearl.com