Part 6
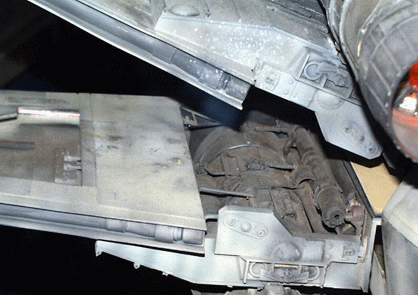
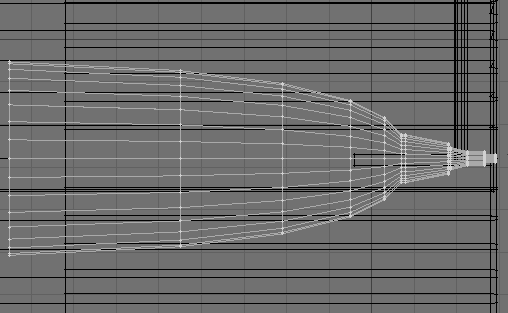
Here we go for the sixth installment: wings, engines and more. This reference shot gives you the best reference for not only wing detail, but also engine nurnie detail for which you will be mostly on your own. I mean, make a disk and extend it around, and do that over and over again, to the level of your own satisfaction. You don't need me for that.
As for wings detail, notice that, while you have to make only one of each, wing, gun, engine, and engine nurnies, you will have to make two sets of the wing-locks/wing-guides, if you desire to build them.
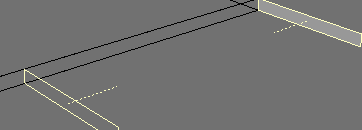
Lastly, note that there is some sort of piping that runs in a groove on the aft section of the wing.
NOTE: Save your files frequently. That way, should anything go wrong, you don't have to go back very far to restart your project.
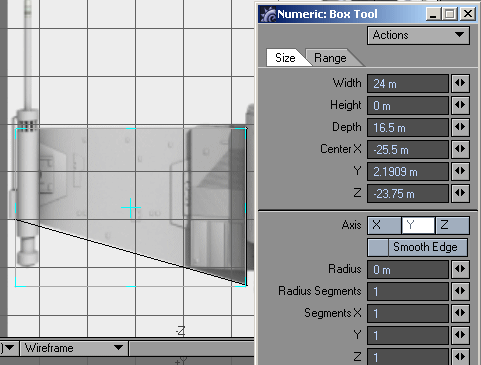
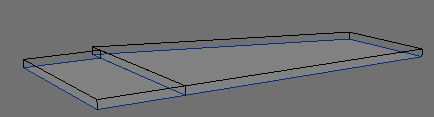
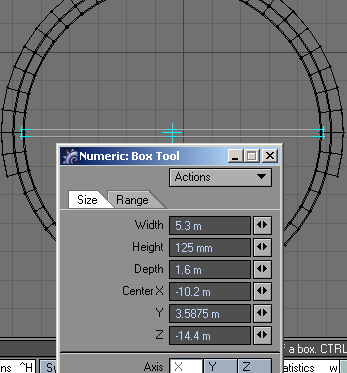
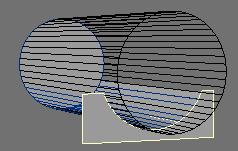
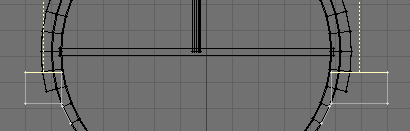
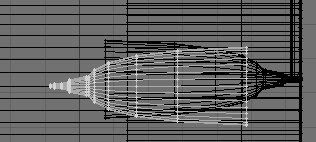
1. With the top-view image (T-view90.jpg) in the background projected on the box shape, create this box outline. If you forgot how to do the background image, go to Part 1 and review - I do ;-o.
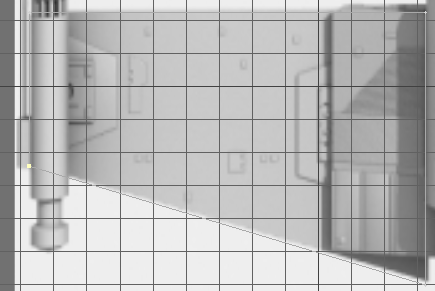
2. Select the corner point and slide it up.

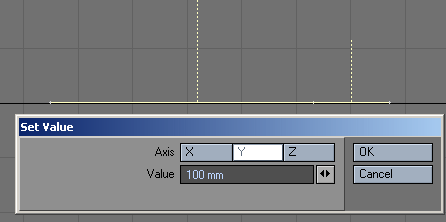
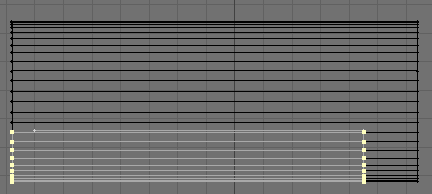
3. Make a second box outline, cut and paste both of them into the same layer and drop them to Y = 100 mm.
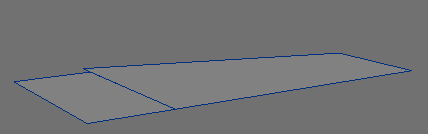
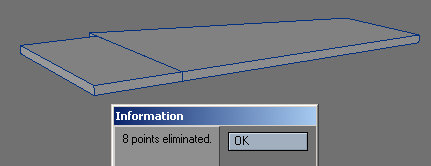
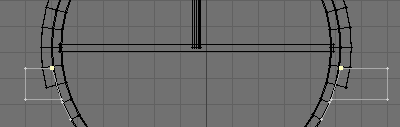
4. This is what you should have. Now align the straight edge points.
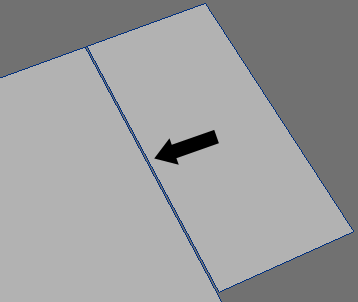
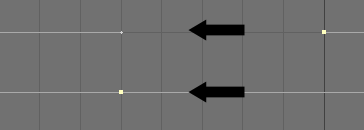
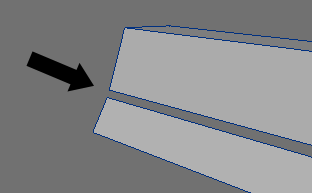
5. 'Mind the gap' (Yes, I've been there). Go to high magnification and slide the point, as you see here indicated, until there is no gap.

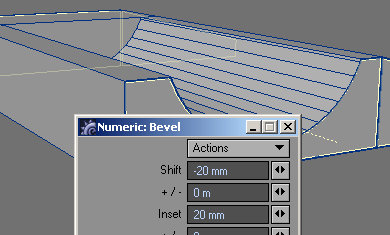
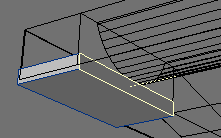
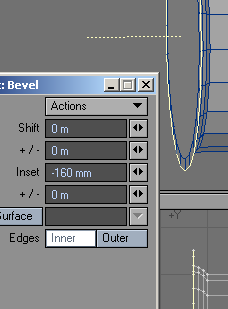
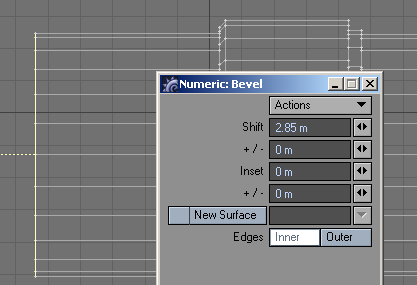
6. Select the now gap-free shapes and copy them to another layer. Then bevel the surface up.
7. Paste them back into the same layer and do a point-merge.

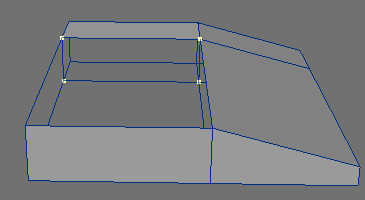
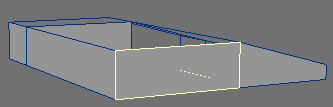
8. Make this box.
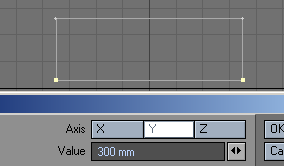

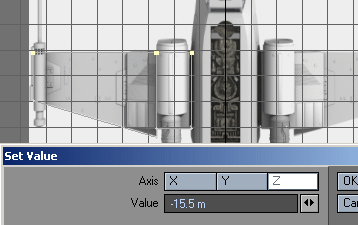
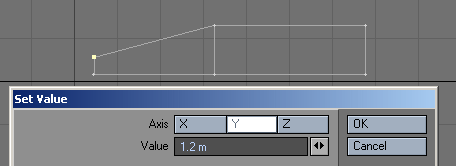
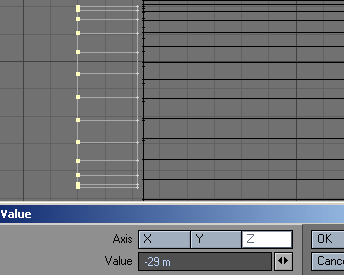
9. In the back view, use Set Value to place the bottom points here, and the upper points here.
10. Select the outside (toward the wing tip) side polygon of that box and hit 'e' and extend it as you see here. Then, in point edit, grab the top edge (outside) points and locate them like this.

11. Make a cut like this. Not too critical, you can slide the points around later. I ended up guessing from the background images as best as I could. Paste the highlighted polygon into an empty layer.
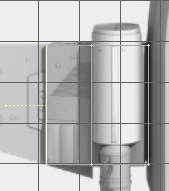
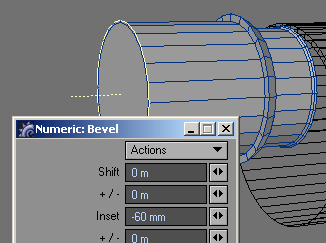
12. Create the main egine body. In the right image you can see the barrel of the engine in the background of the top polygon of the box.
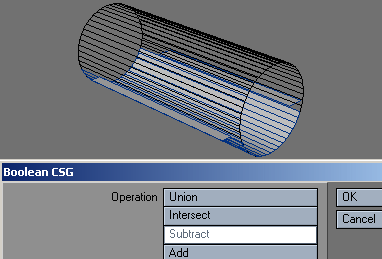
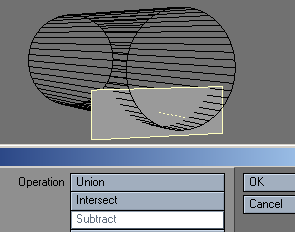
13. Here is what happens next. You go to the CONSTRUCT > Boolean function tool to subtract the shapes with this result. To correct for 'Boolean weirdness', slide the points to line up with the two small flat surfaces.

14. Putting it all together, you'll have this. I created a polygon at the back, where you see those four points selected.
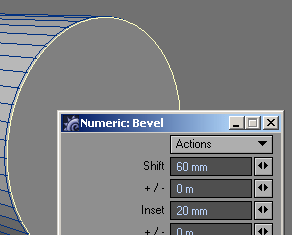
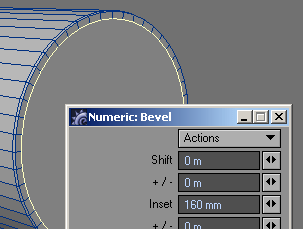
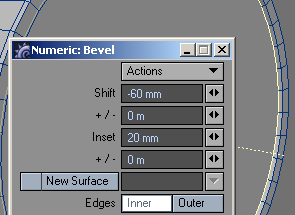
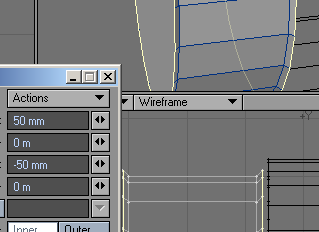
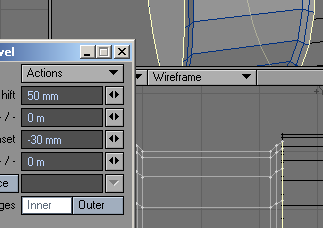
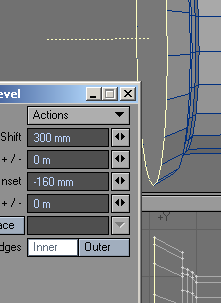
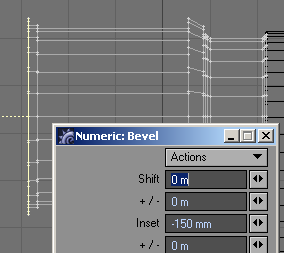
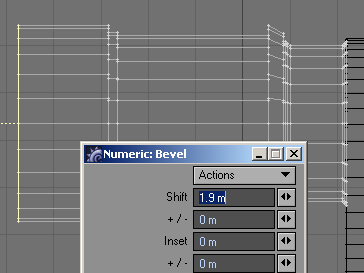
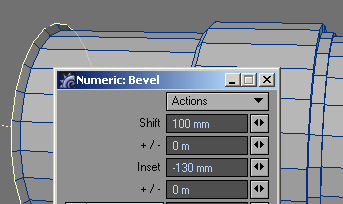
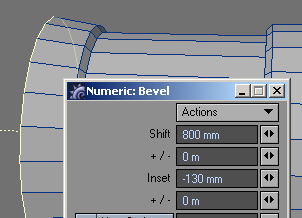
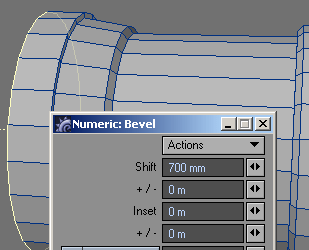
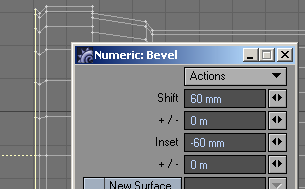
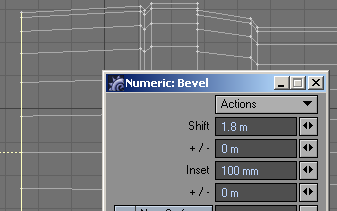
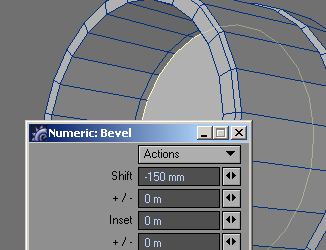
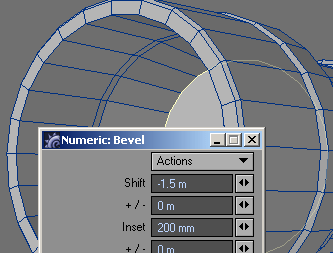
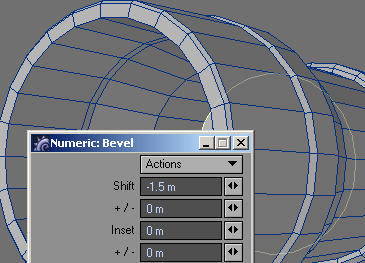
15. Back to the layer with the engine body. COPY it to an empty layer. We'll need the "blank" again later, for more Boolean operations. Follow these bevel instructions.

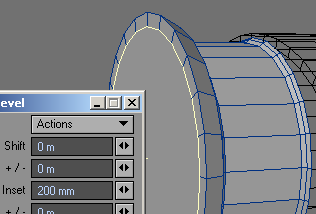
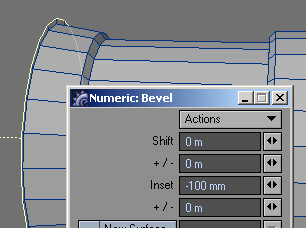
16. Once here, I give the disk a different name. Then bevel it in, and everything from here on has that designation.

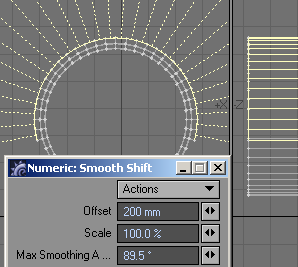
17. Select the polygons at the other end of the engine body, to not accidentally grab inside polygons and follow suit.
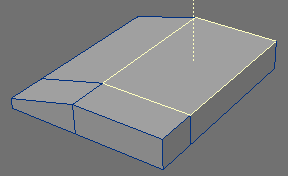
Then smooth shift (Shift-f) as you see here.
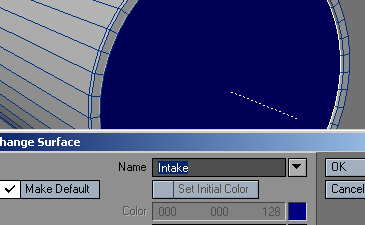
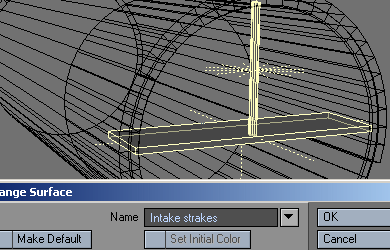
18. Make a box and place it in the exact center of the intake.
19. Next make a small disk, stretch it to the top of the intake, and position it, as you see here...
20. Since the engine extends through the front panel of that support casing, we have to use the engine body "blank/cylinder" in the background to make the Boolean subtraction. NOTE: Don't forget to save your files from time to time.
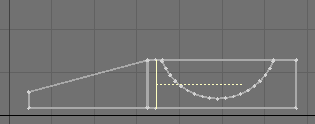
21. After the cut, just select the front panel and delete the 'Boolean weirdness' artifacts, and paste the front panel back into the box.

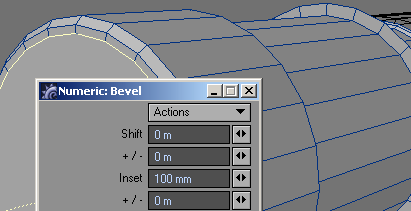
22. A bit of beveling sculpts the front and back panels.

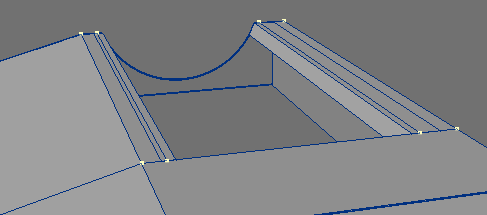
23. Delete the top and bottom polygons of the wing root and create a polygon, where you see the four selected points. You are now left with just the polygons around the perimeter of the wing root box.

24. COPY those two side polygons to an empty layer, flip them, and using the engine box as a guideline, hit 'e' and extend them as you see here. One needs to be exact, and for the other one take a guess.

25. After you paste it all back together, you have this. Do a point merge at this time. Now extend the outside polygon a little, as you see here.
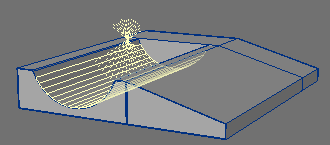

26. Select these polygons, but NOT the top ones, and delete them. Take the remaining polygons from the half-circle, and the two level ones, and paste them into an empty layer. Have the engine in the background.
27. Using the engine cross-section as a guide, hit 'e' and raise the level polygons as you see here. Then make an adjustment to the two inner edges, by sliding those points back a little to roughly conform to the engine's body.

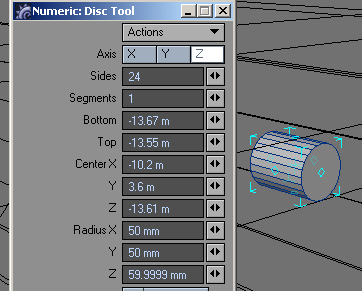
28. Ok, for most of us, there'll be a little gap to eliminate. Do that by welding them together. Make sure that you are consistent with the direction, so that the seam is exactly horizontal, once you are finished.


29. Now you'll need to give the struts a little body, by providing them with a bottom polygon. Use the good old extesion shortcut 'e' for that.
Dang it! We have a small problem. You notice that the two struts extend above the engine hull. To make it right, delete these highlighted polygons on both side of the engine body.

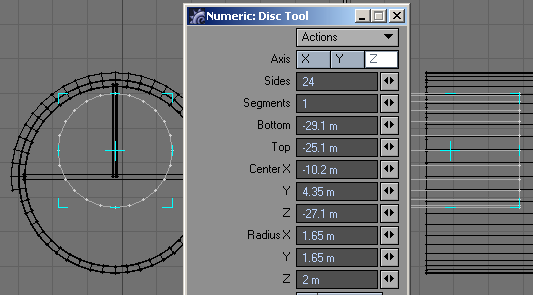
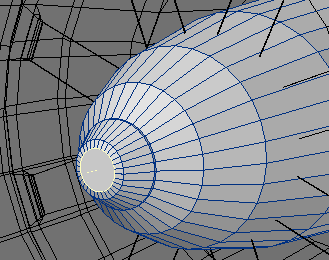
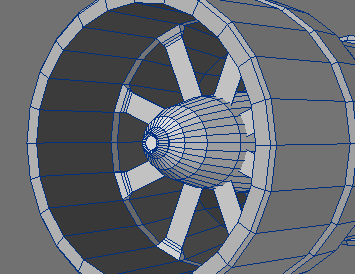
30. Make a tiny little cylinder and position it precisely in the center of the engine intake.
31. Then bevel to your heart's content. Not critical at all. We just need a cone-shaped body in the intake.
32. After you are finished, slide the circular back polygon forward, until it just covers the inside end of the cone.
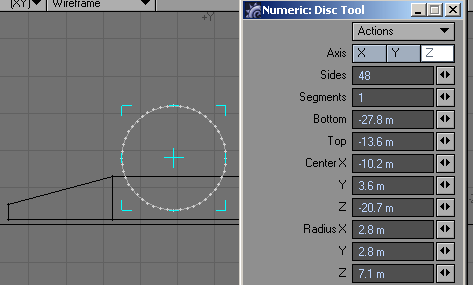
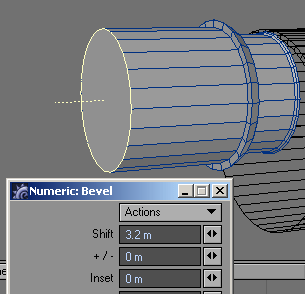
33. Now for the truly unique, off-axis space engines. Create this cylinder.
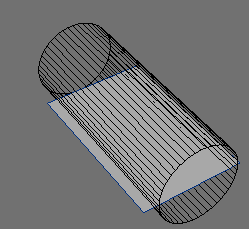
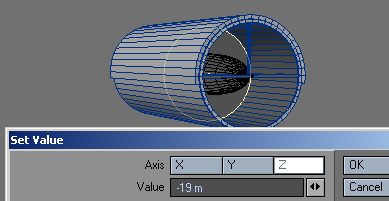
34. ...and using Set Value adjust the ends like this.
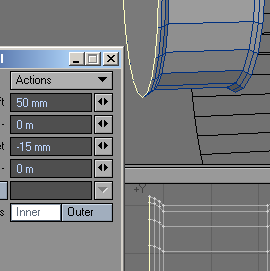
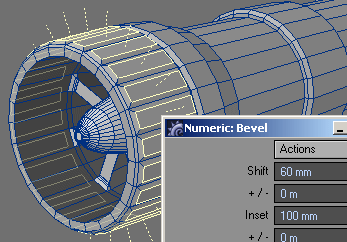
35. Now comes a long beveling sequence. For the first two, select both of the end polygons..and follow the step-by-step instructions


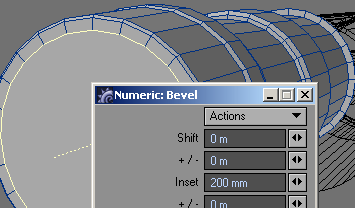


36. Once you have followed all of the bevel instructions, deselect or delete the inside circle.

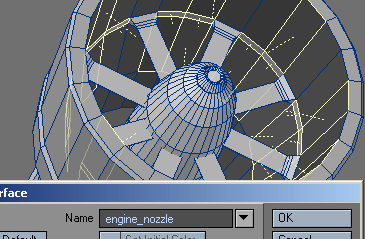
37. Select all of the inside polygons EXCEPT for those forming the thin strip (second polygon row from the edge) and name them engine_nozzle.
38. Copy the intake cone to an empty layer, then rotate it 180 degrees. Just in case you do not know this: Hit 'y' and 'n', rotate the object, then in the numeric panel at the top, enter 180 Degrees, hit 'Enter', close the numeric panel, deselect Rotate via the Space Bar, then hit 'Ctrl-Z' to undo the rotation, hit 'y' and 'n' again, then 'Apply' and you will get the exact 180 Deg rotation.
39. Center it in the nozzle opening, and modify the front anyway you see fit.

40. In the exhaust nozzle, select every third polygon of the strip that you did not rename earlier.
41. Then bevel (shift) them to get to a shape similar to this one. Since they are all selected, they will bevel simultaneously toward the middle of the nozzle.
42. When you're finished, select the remaining polygons and group them with the engine nozzle.
43. Select every one of the exhaust nozzle ouside polygons and bevel them.
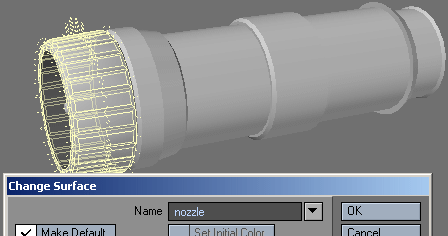
44. Name all of the outside polygons 'nozzle'
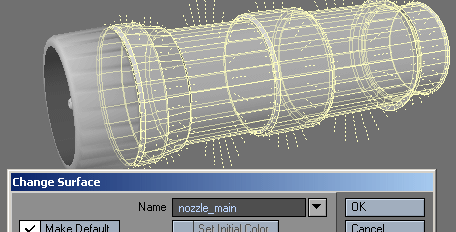
45. Name the rest of the space engine body 'nozzle_main'. The reason for naming those parts is that this way we can assign different texture elements to them, let's say more or less smoothing, for example.

46. One quick change here. Go to the layer with the wing box and in the side view select these two points (edges)
47. Pull them level with the top of the box.

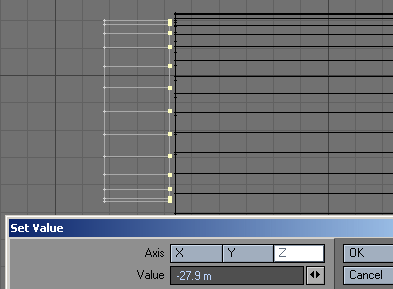
48. Then take the front points and use Set Value to push them back to where they should be.
Time for a break...and then on to the next part...
You can download the wings mesh here (last update 27 AUG 06): Xwing5.ZIP
In part 7 of this tutorial you'll finish wings, engines, and all of the rest of the goods.
Created by Karl Stocker (pixeltek), a 3D hobbyist and occasional freelance artist. If you'd like to contact him, send email to: pixeltek@yahoo.com or visit his website at: www.cosmic-pearl.com